Run cells in the Astro Cloud IDE
Test your data pipeline as a whole or in parts using a dedicated and isolated testing environment in the Astro Cloud IDE. If a cell contains code, you can run it in the IDE.
Run a cell
-
In the Astro UI, select a Workspace and then click Cloud IDE.
-
Select a project on the Projects page.
-
Select a pipeline in the Pipelines list.
-
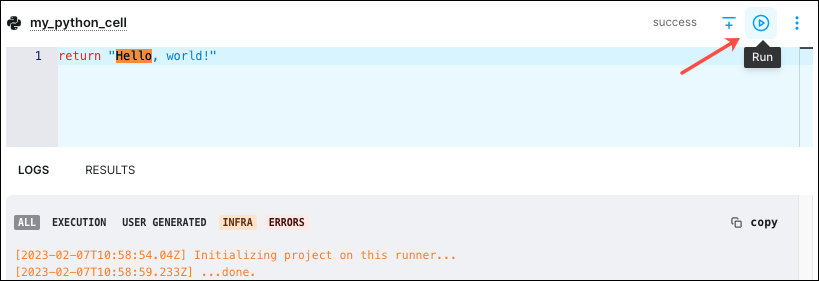
In the pipeline editor, go to a cell and click Run.

After you run a cell, the Logs tab contains all logs generated by the cell run, including task logs, component logs, and errors. The Results tab appears if your cell runs successfully and contains the output of your cell.

When you run a cell, the Cloud IDE sends a request to an isolated worker in the Astronomer managed control plane. The worker executes your cell and returns the results to the Cloud IDE. Executing cells in the Cloud IDE is free. For more information on execution, see Execution.
Run cells with their dependencies
You can run a cell with its upstream or downstream dependencies to test parts of your data pipeline that should run together. To run a cell and its upstream or downstream dependencies, click the menu next to Run and then select an option.

When you run a cell with dependencies, the Cloud IDE runs the most upstream cell first and then runs each downstream cell in order. If you have data dependencies, the Cloud IDE passes data from upstream cells to downstream cells as defined in your code. The logs and results for a given cell run appear in the cell's editing window.
Run your data pipeline
To test your entire data pipeline in a single run, click Run in the top right corner of your pipeline editing window. The Cloud IDE runs all cells with no upstream dependencies first, then runs any downstream cells based on your code.
Configure a GitHub repo for running cells
You can use the Astro Cloud IDE GitHub integration to run your code with additional dependencies that aren't configurable within the Cloud IDE, such as helper functions in an include folder. The Astro Cloud IDE loads files from your GitHub repository into the testing environment so that your cells can access all of the required files.
-
Deploy your Astro Cloud IDE project to GitHub if you haven't already. See Deploy a project.
-
In the Astro UI, select a Workspace and then click Cloud IDE.
-
Select a project on the Projects page.
-
In the GitHub Repo pane, click Configure.
-
Configure the following values:
- Clone GitHub repo during cell execution: Click the toggle to allow the Cloud IDE to access your GitHub repository files when executing cells. Turn on this feature if you have cells that depend on helper files, such as helper functions in
include. - Disable auto sync in favor of manual sync: Optional. Click the toggle to sync your repository only on a manual basis. When you click the toggle, a button appears in the pane that you can use to manually sync your GitHub repository to your Cloud IDE environment.
- Clone GitHub repo during cell execution: Click the toggle to allow the Cloud IDE to access your GitHub repository files when executing cells. Turn on this feature if you have cells that depend on helper files, such as helper functions in
Troubleshoot cell runs
If the error message Could not connect to cell execution environment appears after running a cell, check the Astro status page to determine the operational status of the Astro control plane. If the control plane is operational, contact Astronomer support and share the error. To enable cell runs, Astronomer support might need to set up additional cloud infrastructure for the IDE.