Manage your ML models with Weights and Biases and Airflow
Weights and Biases (W&B) is a machine learning platform for model management that includes features like experiment tracking, dataset versioning, and model performance evaluation and visualization. Using W&B with Airflow gives you a powerful ML orchestration stack with first-class features for building, training, and managing your models.
In this tutorial, you'll learn how to create an Airflow DAG that completes feature engineering, model training, and predictions with the Astro Python SDK and scikit-learn, and registers the model with W&B for evaluation and visualization.
This tutorial was developed in partnership with Weights and Biases. For resources on implementing other use cases with W&B, see Tutorials.
Time to complete
This tutorial takes approximately one hour to complete.
Assumed knowledge
To get the most out of this tutorial, you should be familiar with:
- Airflow operators. See Operators 101.
- The Astro Python SDK. See Write a DAG with the Astro Python SDK
- Weights and Biases. See What is Weights and Biases?.
Prerequisites
- The Astro CLI.
- A Weights and Biases account. Personal accounts are available for free.
Quickstart
If you have a Github account, you can get started quickly by cloning the demo repository. For more detailed instructions for setting up the project, start with Step 1.
-
Clone the demo repository:
git clone https://github.com/astronomer/airflow-wandb-demo
cd airflow-wandb-demo -
Update the .env file with your WANDB_API_KEY.
-
Start Airflow by running:
astro dev start -
Continue with Step 7 below.
Step 1: Configure your Astro project
Use the Astro CLI to create and run an Airflow project locally.
-
Create a new Astro project:
$ mkdir astro-wandb-tutorial && cd astro-wandb-tutorial
$ astro dev init -
Add the following line to the
requirements.txtfile of your Astro project:astro-sdk-python[postgres]==1.5.3
wandb==0.14.0
pandas==1.5.3
numpy==1.24.2
scikit-learn==1.2.2This installs the packages needed to transform the data and run feature engineering, model training, and predictions.
Step 2: Prepare the data
This tutorial will create a model that classifies churn risk based on customer data.
- Create a subfolder called
datain your Astro projectincludefolder. - Download the demo CSV files from this GitHub directory.
- Save the downloaded CSV files in the
include/datafolder. You should have 5 files in total.
Step 3: Create your SQL transformation scripts
Before feature engineering and training, the data needs to be transformed. This tutorial uses the Astro Python SDK transform_file function to complete several transformations using SQL.
-
Create a file in your
includefolder calledcustomer_churn_month.sqland copy the following code into the file.with subscription_periods as (
select subscription_id,
customer_id,
cast(start_date as date) as start_date,
cast(end_date as date) as end_date,
monthly_amount
from {{subscription_periods}}
),
months as (
select cast(date_month as date) as date_month from {{util_months}}
),
customers as (
select
customer_id,
date_trunc('month', min(start_date)) as date_month_start,
date_trunc('month', max(end_date)) as date_month_end
from subscription_periods
group by 1
),
customer_months as (
select
customers.customer_id,
months.date_month
from customers
inner join months
on months.date_month >= customers.date_month_start
and months.date_month < customers.date_month_end
),
joined as (
select
customer_months.date_month,
customer_months.customer_id,
coalesce(subscription_periods.monthly_amount, 0) as mrr
from customer_months
left join subscription_periods
on customer_months.customer_id = subscription_periods.customer_id
and customer_months.date_month >= subscription_periods.start_date
and (customer_months.date_month < subscription_periods.end_date
or subscription_periods.end_date is null)
),
customer_revenue_by_month as (
select
date_month,
customer_id,
mrr,
mrr > 0 as is_active,
min(case when mrr > 0 then date_month end) over (
partition by customer_id
) as first_active_month,
max(case when mrr > 0 then date_month end) over (
partition by customer_id
) as last_active_month,
case
when min(case when mrr > 0 then date_month end) over (
partition by customer_id
) = date_month then true
else false end as is_first_month,
case
when max(case when mrr > 0 then date_month end) over (
partition by customer_id
) = date_month then true
else false end as is_last_month
from joined
),
joined1 as (
select
date_month + interval '1 month' as date_month,
customer_id,
0::float as mrr,
false as is_active,
first_active_month,
last_active_month,
false as is_first_month,
false as is_last_month
from customer_revenue_by_month
where is_last_month
)
select * from joined1; -
Create another file in your
includefolder calledcustomers.sqland copy the following code into the file.with
customers as (
select *
from {{customers_table}}
),
orders as (
select *
from {{orders_table}}
),
payments as (
select *
from {{payments_table}}
),
customer_orders as (
select
customer_id,
cast(min(order_date) as date) as first_order,
cast(max(order_date) as date) as most_recent_order,
count(order_id) as number_of_orders
from orders
group by customer_id
),
customer_payments as (
select
orders.customer_id,
sum(amount / 100) as total_amount
from payments
left join orders on payments.order_id = orders.order_id
group by orders.customer_id
),
final as (
select
customers.customer_id,
customers.first_name,
customers.last_name,
customer_orders.first_order,
customer_orders.most_recent_order,
customer_orders.number_of_orders,
customer_payments.total_amount as customer_lifetime_value
from customers
left join customer_orders on customers.customer_id = customer_orders.customer_id
left join customer_payments on customers.customer_id = customer_payments.customer_id
)
select
*
from final
Step 4: Create a W&B API Key
In your W&B account, create an API key that you will use to connect Airflow to W&B. You can create a key by going to the Authorize page or your user settings.
Step 5: Set up your connections and environment variables
You'll use environment variables to create Airflow connections to Snowflake and W&B, as well as to configure the Astro Python SDK.
-
Open the
.envfile in your Astro project and paste the following code.WANDB_API_KEY='<your-wandb-api-key>'
AIRFLOW_CONN_POSTGRES_DEFAULT='postgresql://postgres:postgres@host.docker.internal:5432/postgres?options=-csearch_path%3Dtmp_astro' -
Replace
<your-wandb-api-key>with the API key you created in Step 4. No changes are needed for the AIRFLOW_CONN_POSTGRES_DEFAULT environment variable.
Step 6: Create your DAG
-
Create a file in your Astro project
dagsfolder calledcustomer_analytics.pyand copy the following code into the file:from datetime import datetime
import os
from astro import sql as aql
from astro.files import File
from astro.sql.table import Table
from airflow.decorators import dag, task_group
import pandas as pd
import numpy as np
from sklearn.model_selection import train_test_split
from sklearn.ensemble import RandomForestClassifier
import tempfile
import pickle
from pathlib import Path
import wandb
from wandb.sklearn import plot_precision_recall, plot_feature_importances
from wandb.sklearn import plot_class_proportions, plot_learning_curve, plot_roc
_POSTGRES_CONN = "postgres_default"
wandb_project = "demo"
wandb_team = "astro-demos"
local_data_dir = "include/data"
sources = ["subscription_periods", "util_months", "customers", "orders", "payments"]
@dag(schedule=None, start_date=datetime(2023, 1, 1), catchup=False)
def customer_analytics():
@task_group()
def extract_and_load(sources: list) -> dict:
for source in sources:
aql.load_file(
task_id=f"load_{source}",
input_file=File(f"{local_data_dir}/{source}.csv"),
output_table=Table(
name=f"STG_{source.upper()}", conn_id=_POSTGRES_CONN
),
if_exists="replace",
)
@task_group()
def transform():
aql.transform_file(
task_id="transform_churn",
file_path=f"{Path(__file__).parent.as_posix()}/../include/customer_churn_month.sql",
parameters={
"subscription_periods": Table(
name="STG_SUBSCRIPTION_PERIODS", conn_id=_POSTGRES_CONN
),
"util_months": Table(name="STG_UTIL_MONTHS", conn_id=_POSTGRES_CONN),
},
op_kwargs={
"output_table": Table(
name="CUSTOMER_CHURN_MONTH", conn_id=_POSTGRES_CONN
)
},
)
aql.transform_file(
task_id="transform_customers",
file_path=f"{Path(__file__).parent.as_posix()}/../include/customers.sql",
parameters={
"customers_table": Table(name="STG_CUSTOMERS", conn_id=_POSTGRES_CONN),
"orders_table": Table(name="STG_ORDERS", conn_id=_POSTGRES_CONN),
"payments_table": Table(name="STG_PAYMENTS", conn_id=_POSTGRES_CONN),
},
op_kwargs={"output_table": Table(name="CUSTOMERS", conn_id=_POSTGRES_CONN)},
)
@aql.dataframe()
def features(customer_df: pd.DataFrame, churned_df: pd.DataFrame) -> pd.DataFrame:
customer_df["customer_id"] = customer_df["customer_id"].apply(str)
customer_df.set_index("customer_id", inplace=True)
churned_df["customer_id"] = churned_df["customer_id"].apply(str)
churned_df.set_index("customer_id", inplace=True)
churned_df["is_active"] = churned_df["is_active"].astype(int).replace(0, 1)
df = (
customer_df[["number_of_orders", "customer_lifetime_value"]]
.join(churned_df[["is_active"]], how="left")
.fillna(0)
.reset_index()
) # inplace=True)
return df
@aql.dataframe()
def train(df: pd.DataFrame) -> dict:
features = ["number_of_orders", "customer_lifetime_value"]
target = ["is_active"]
test_size = 0.3
X_train, X_test, y_train, y_test = train_test_split(
df[features], df[target], test_size=test_size, random_state=1883
)
X_train = np.array(X_train.values.tolist())
y_train = np.array(y_train.values.tolist()).reshape(
len(y_train),
)
y_train = y_train.reshape(
len(y_train),
)
X_test = np.array(X_test.values.tolist())
y_test = np.array(y_test.values.tolist())
y_test = y_test.reshape(
len(y_test),
)
model = RandomForestClassifier()
_ = model.fit(X_train, y_train)
model_params = model.get_params()
y_pred = model.predict(X_test)
y_probas = model.predict_proba(X_test)
importances = model.feature_importances_
indices = np.argsort(importances)[::-1]
wandb.login()
run = wandb.init(
project=wandb_project,
config=model_params,
entity=wandb_team,
group="wandb-demo",
name="jaffle_churn",
dir="include",
mode="online",
)
wandb.config.update(
{"test_size": test_size, "train_len": len(X_train), "test_len": len(X_test)}
)
plot_class_proportions(y_train, y_test, ["not_churned", "churned"])
plot_learning_curve(model, X_train, y_train)
plot_roc(y_test, y_probas, ["not_churned", "churned"])
plot_precision_recall(y_test, y_probas, ["not_churned", "churned"])
plot_feature_importances(model)
model_artifact_name = "churn_classifier"
with tempfile.NamedTemporaryFile(delete=False) as tf:
pickle.dump(model, tf)
tf.close()
artifact = wandb.Artifact(model_artifact_name, type="model")
artifact.add_file(local_path=tf.name, name=model_artifact_name)
wandb.log_artifact(artifact)
os.remove(tf.name)
wandb.finish()
return {"run_id": run.id, "artifact_name": model_artifact_name}
@aql.dataframe()
def predict(model_info: dict, customer_df: pd.DataFrame) -> pd.DataFrame:
wandb.login()
run = wandb.init(
project=wandb_project,
entity=wandb_team,
group="wandb-demo",
name="jaffle_churn",
dir="include",
resume="must",
id=model_info["run_id"],
)
customer_df.fillna(0, inplace=True)
features = ["number_of_orders", "customer_lifetime_value"]
artifact = run.use_artifact(
f"{model_info['artifact_name']}:latest", type="model"
)
with tempfile.TemporaryDirectory() as td:
with open(artifact.file(td), "rb") as mf:
model = pickle.load(mf)
customer_df["PRED"] = model.predict_proba(
np.array(customer_df[features].values.tolist())
)[:, 0]
wandb.finish()
customer_df.reset_index(inplace=True)
return customer_df
_extract_and_load = extract_and_load(sources)
_transformed = transform()
_features = features(
customer_df=Table(name="customers", conn_id=_POSTGRES_CONN),
churned_df=Table(name="customer_churn_month", conn_id=_POSTGRES_CONN),
)
_model_info = train(df=_features)
_predict_churn = predict(
model_info=_model_info,
customer_df=Table(name="customers", conn_id=_POSTGRES_CONN),
output_table=Table(name=f"pred_churn", conn_id=_POSTGRES_CONN),
)
_extract_and_load >> _transformed >> _features
customer_analytics()This DAG completes the following steps:
- The
extract_and_loadtask group contains one task for each CSV in yourinclude/datafolder that uses the Astro Python SDKload_filefunction to load the data to Postgres. - The
transformtask group contains two tasks that transform the data using the Astro Python SDKtransform_filefunction and the SQL scripts in yourincludefolder. - The
featurestask is a Python function implemented with the Astro Python SDK@dataframedecorator that uses Pandas to create the features needed for the model. - The
traintask is a Python function implemented with the Astro Python SDK@dataframedecorator that uses scikit-learn to train a Random Forest classifier model and push the results to W&B. - The
predicttask pulls the model from W&B in order to make predictions and stores them in postgres.
- The
-
Run the following command to start your project in a local environment:
astro dev start
Step 7: Run your DAG and view results
-
Open the (Airflow UI)[http://localhost:8080], unpause the
customer_analyticsDAG, and trigger the DAG. -
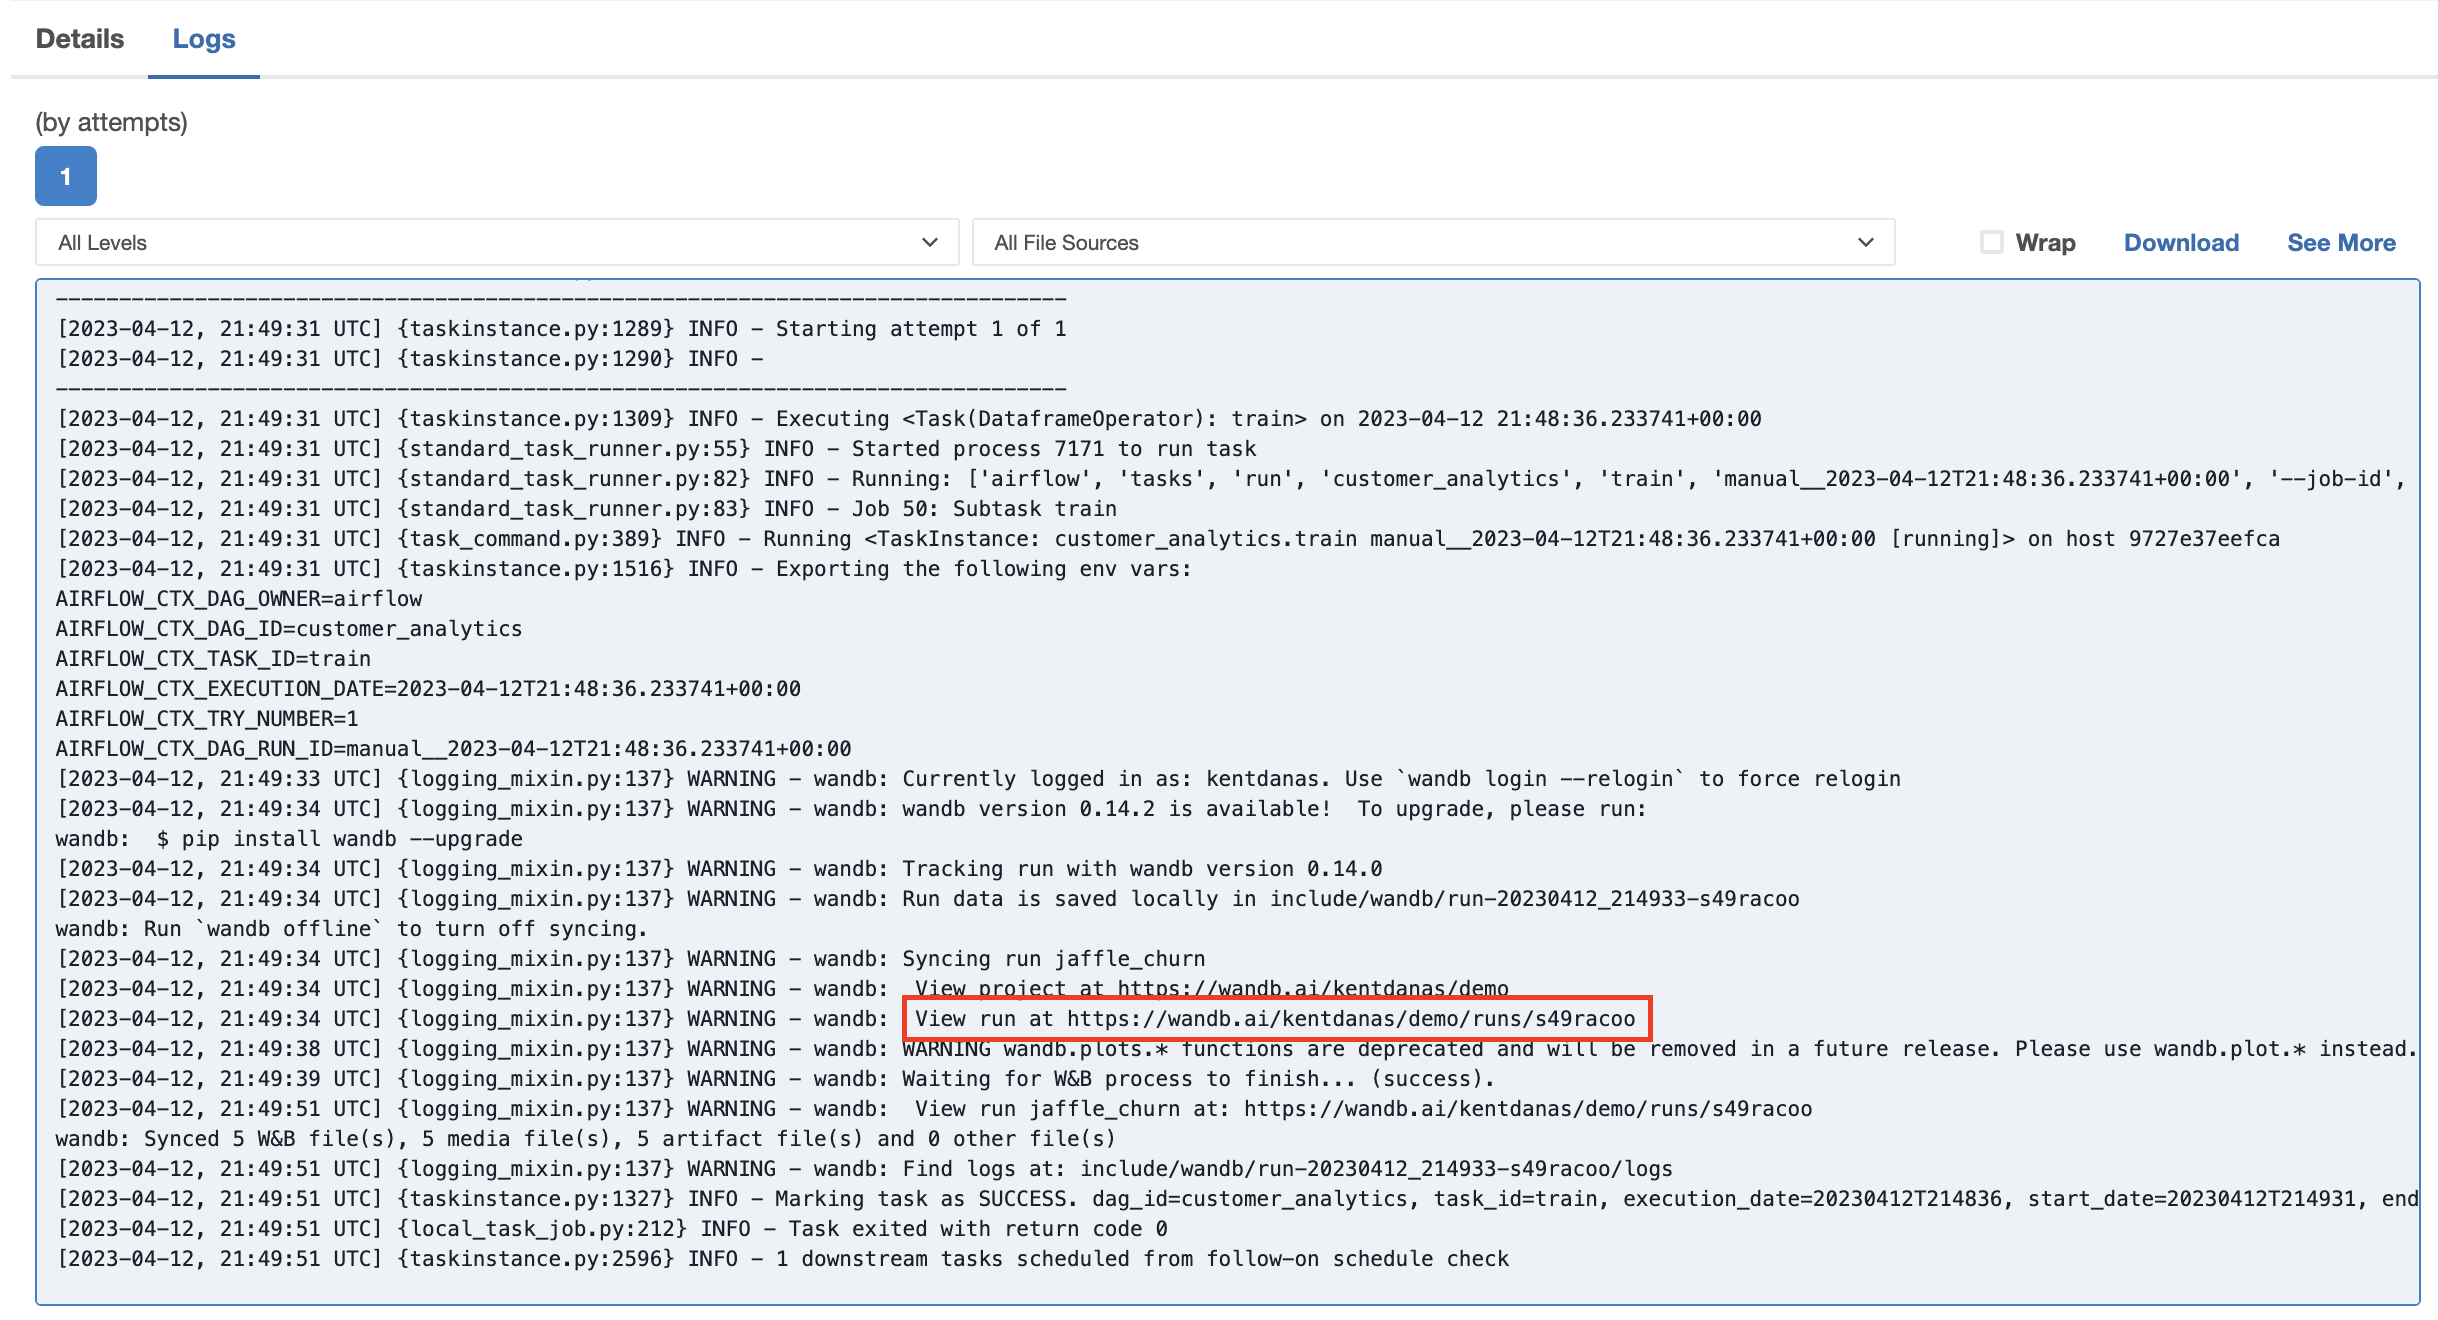
The logs in the
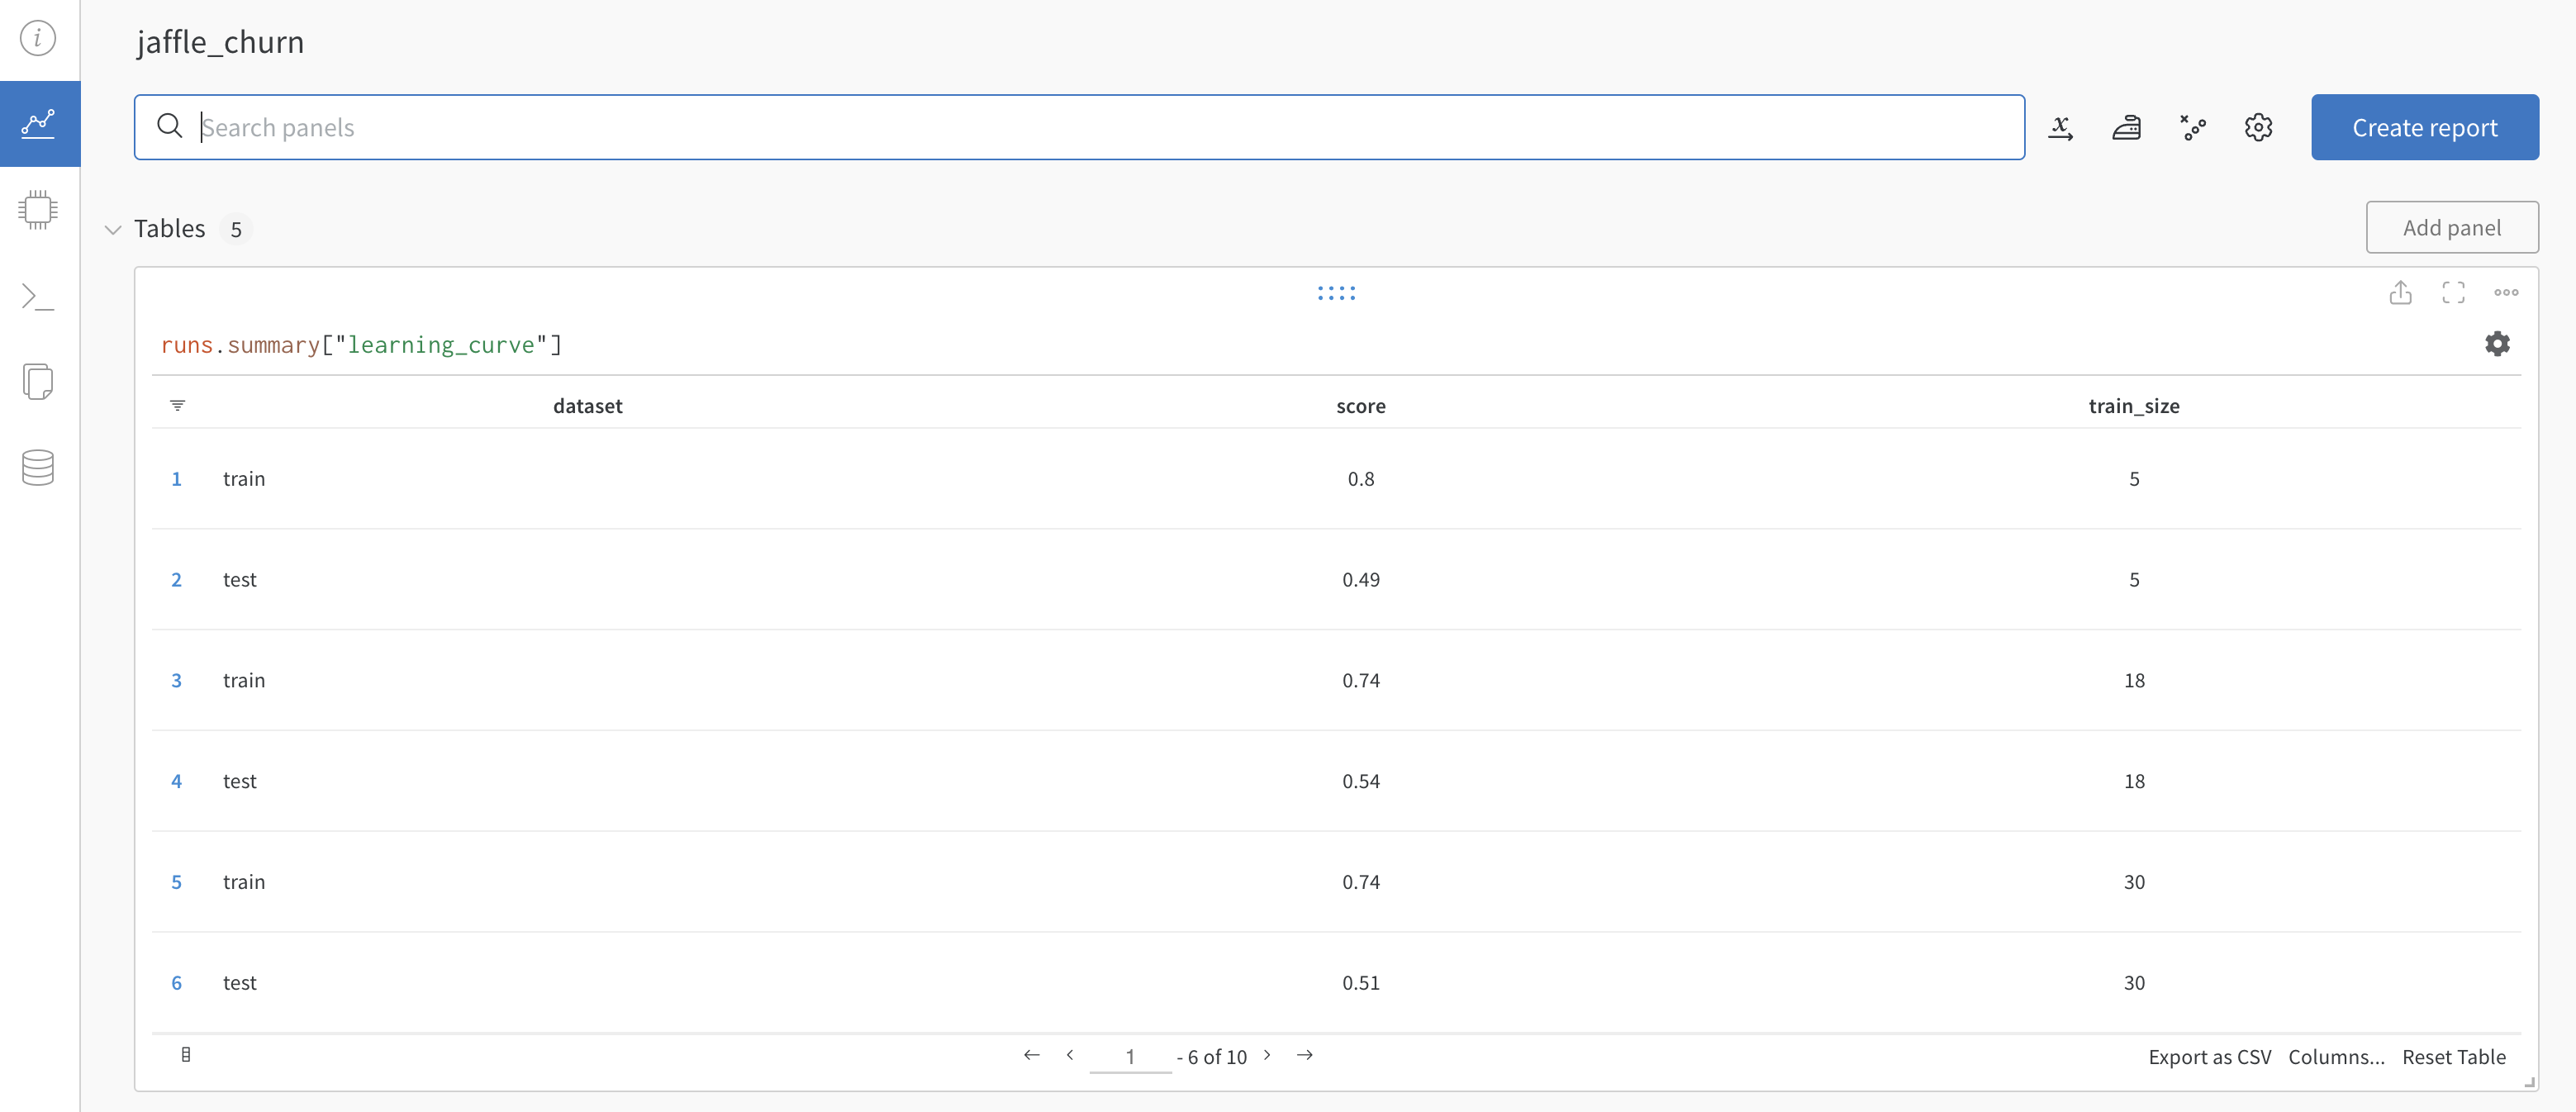
trainandpredicttasks will contain a link to your W&B project which shows plotted results from the training and prediction.
Go to one of the links to view the results in W&B.
