Deploy code with the Astro GitHub integration
Astronomer's built-in GitHub integration is the fastest way to implement CI/CD for Apache Airflow and deploy code to Astro. Astro’s automatic deploy system both eliminates the need to implement GitHub Actions and gives you greater visibility into the code you’re running on Astro.
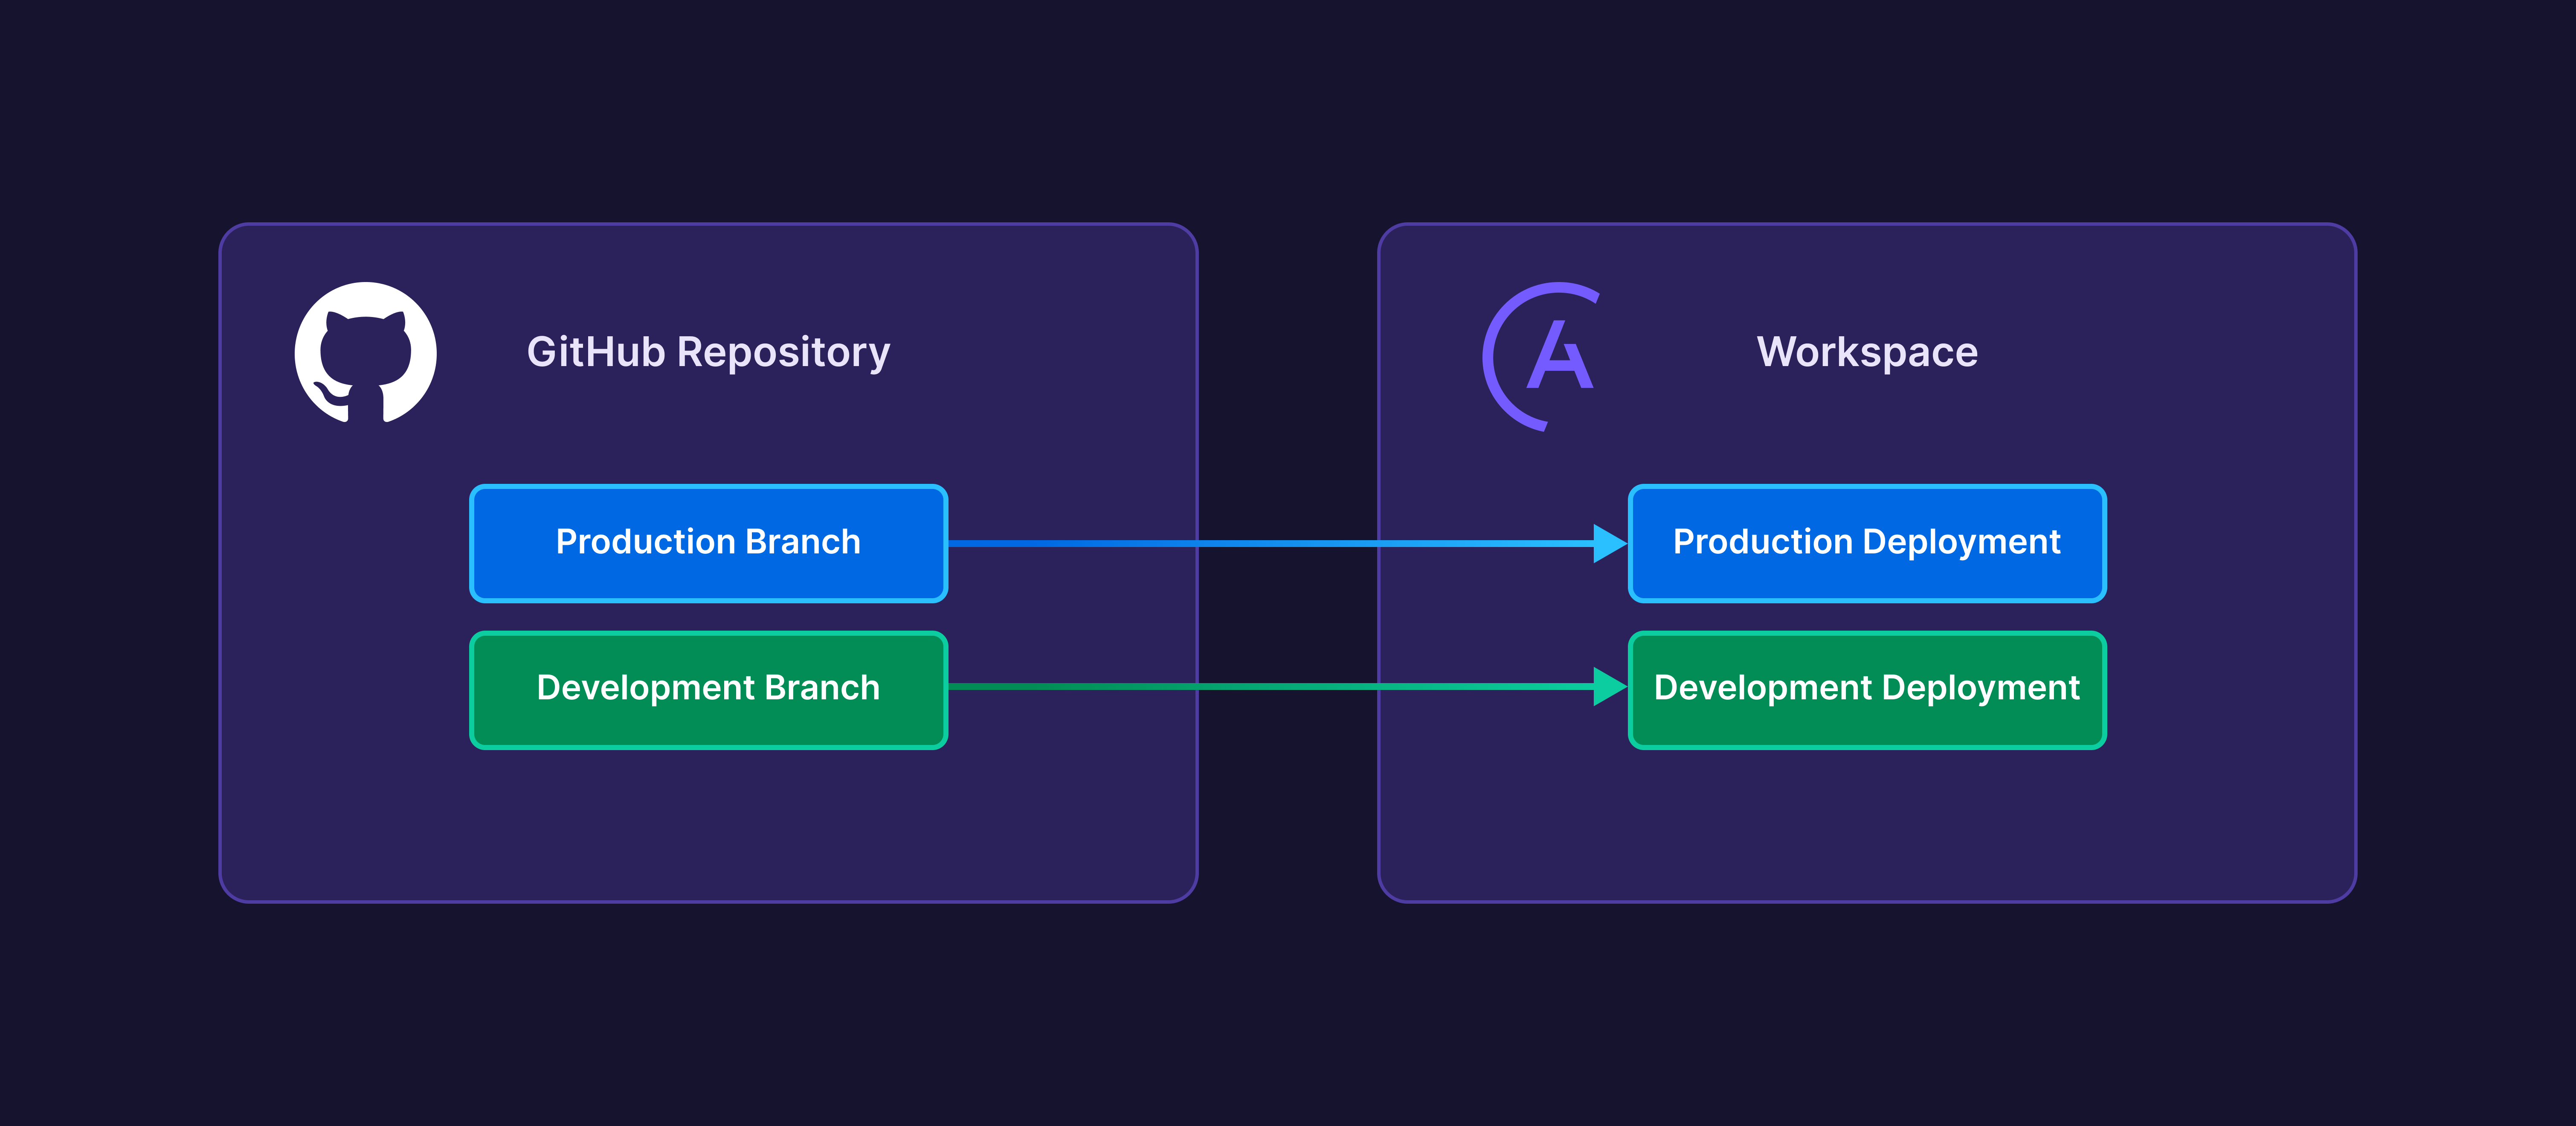
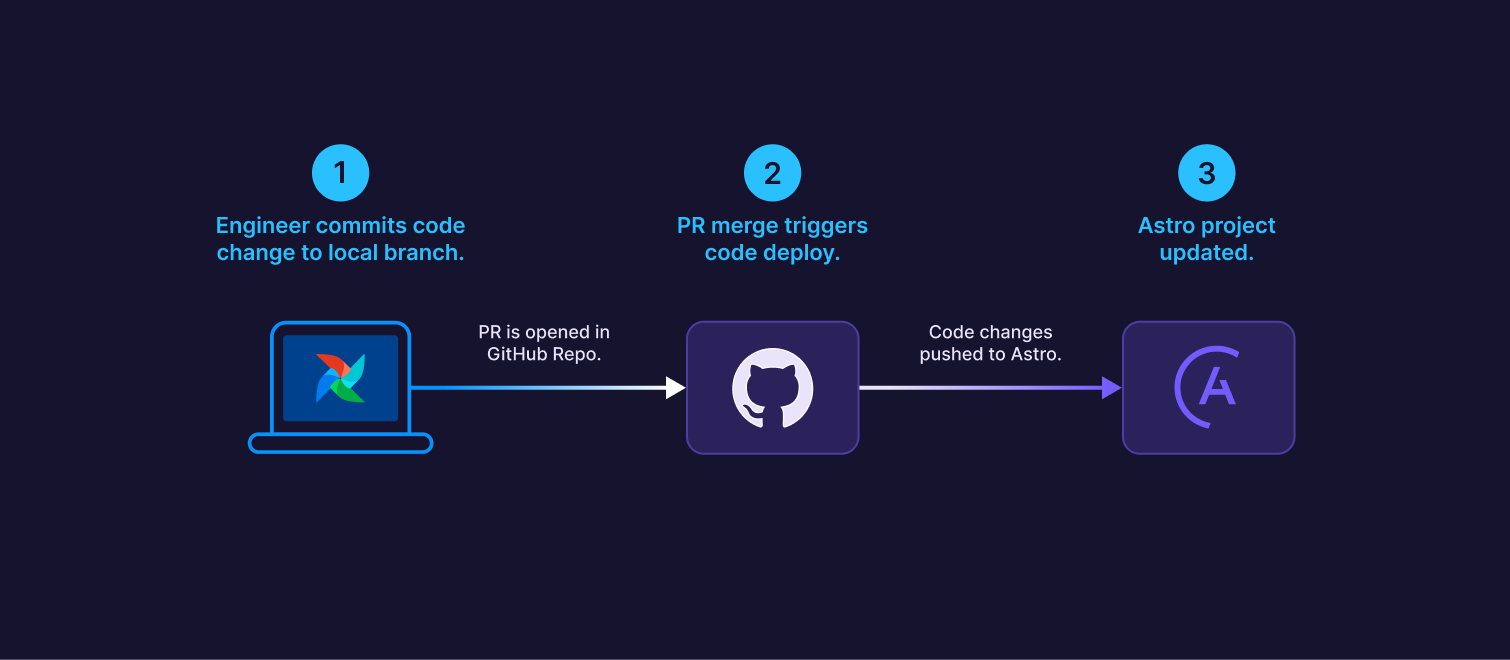
To deploy code through an integrated GitHub repository, you first connect a GitHub repository with your Astro project to an Astro Workspace. Then, you map a Git branch in that repository to an Astro Deployment. When a pull request is merged into your mapped branch, your code is automatically deployed to Astro.
Compared to deploying code manually using the Astro CLI or through a custom CI/CD process, using Astro’s GitHub integration:
- Allows you to enforce software development best practices without maintaining custom CI/CD scripts.
- Enables developers to iterate on DAG code quickly.
- Shows Git metadata directly in the Astro UI, including Git commit descriptions.
- Gives you greater visibility into the status and detailed logs of an individual deploy.
Best practices
To make the most out of the Astro GitHub integration, Astronomer recommends the following:
- Consider mapping long-lasting
mainanddevbranches in GitHub to Deployments. For example, you would map amainbranch to a production Deployment and yourdevbranch to your development Deployment. This approach is described in Develop a CI/CD strategy. - Run CI checks on your DAGs and project code as part of your pull request review process. There is currently no testing included in the default GitHub deploy process, so ensure that your DAG changes pass unit tests before they’re merged and deployed.
- Write descriptive commit messages or pull request descriptions for any project changes. These messages appear in the Astro UI under Overview to give your team more context about each deploy.
Limitations
The Astro GitHub integration is not supported if any of the following are true:
- You build a custom Astro Runtime image using
docker buildas part of your deploy process, for example to pull Python packages from a private repository. However, using the-basedistribution of Astro Runtime is supported. - You need to deploy images from an external or private Docker registry.
- You use the
--image-onlyflag in the Astro CLI, or you need to exclude DAGs from specific deploys. This is usually the case if you have a multiple-repository deploy strategy as described in Develop a CI/CD strategy. - Your repository is hosted in an on-premises GitHub Enterprise server. To deploy code from an on-premises repository, see Private network CI/CD templates.
- If you trigger a deploy that includes a downgrade of Astro Runtime, the deploy will silently fail. Astronomer recommends only downgrading Deployments using rollbacks.
There is currently no limit or additional charge for deploying code to Astro with the GitHub integration, but Astronomer might reach out to discuss your usage if you trigger an unusually large number of deploys.
Prerequisites
- Workspace Admin permissions on an Astro Workspace.
- At least one Astro Deployment.
To connect to an existing repository:
- A GitHub user account with read permissions to the repository containing your Astro project. If you don't have these permissions, send a request to your GitHub repository administrator when prompted by Astro. The read permissions are required so that you can map Deployments to repositories in the Astro UI.
- A GitHub repository that contains an Astro project. The Astro project can exist at the root directory or any subdirectory in your repository.
- At least one branch, such as a
devorproductionbranch, that you want to deploy to Astro.
To create a new repository:
- A GitHub user account with permission to create repositories. If you belong to a GitHub Organization and don't have these permissions, send a request to your GitHub repository administrator when prompted by Astro.
- After you create and connect to your repository from Astro, you need to add an Astro project. The Astro project can exist at the root directory or any subdirectory in your repository.
- After you create and connect to your repository from Astro, you need to make at least one branch, such as a
devorproductionbranch, that you want to deploy to Astro.
Connect a GitHub repository to a Workspace
Before you begin, ensure that you’re logged in to GitHub with permissions to read code from the repository where you want to deploy code.
-
In your Workspace, click Workspace Settings > Git Deploys.
-
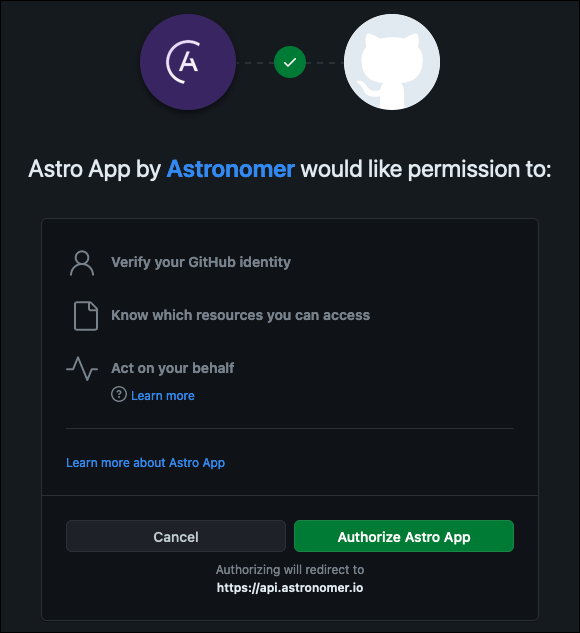
Click Authorize GitHub Application to authorize Astro to a new GitHub account. A window appears instructing you to authorize the Astro App on your personal GitHub account. Follow the prompts to authorize the application.
 info
infoYou only need to authorize the GitHub application once. Afterwards, you can connect to additional repositories directly from the Astro UI.
-
Return to the Astro UI. From the Git Deploys screen, click Connect Repository.
-
Select the organization that contains the repository you want to connect to your Deployment. If your GitHub organization isn't available, click Add Organization on GitHub. Select the organization that contains the repository you want to integrate with Astro, then click Continue. A new window prompts you to allow Astro App to access either all repositories or specific repositories within your GitHub Organization. Astronomer recommends Only select repositories. After you return to the Astro UI, refresh the page to make the GitHub organization appear as a selectable option.
-
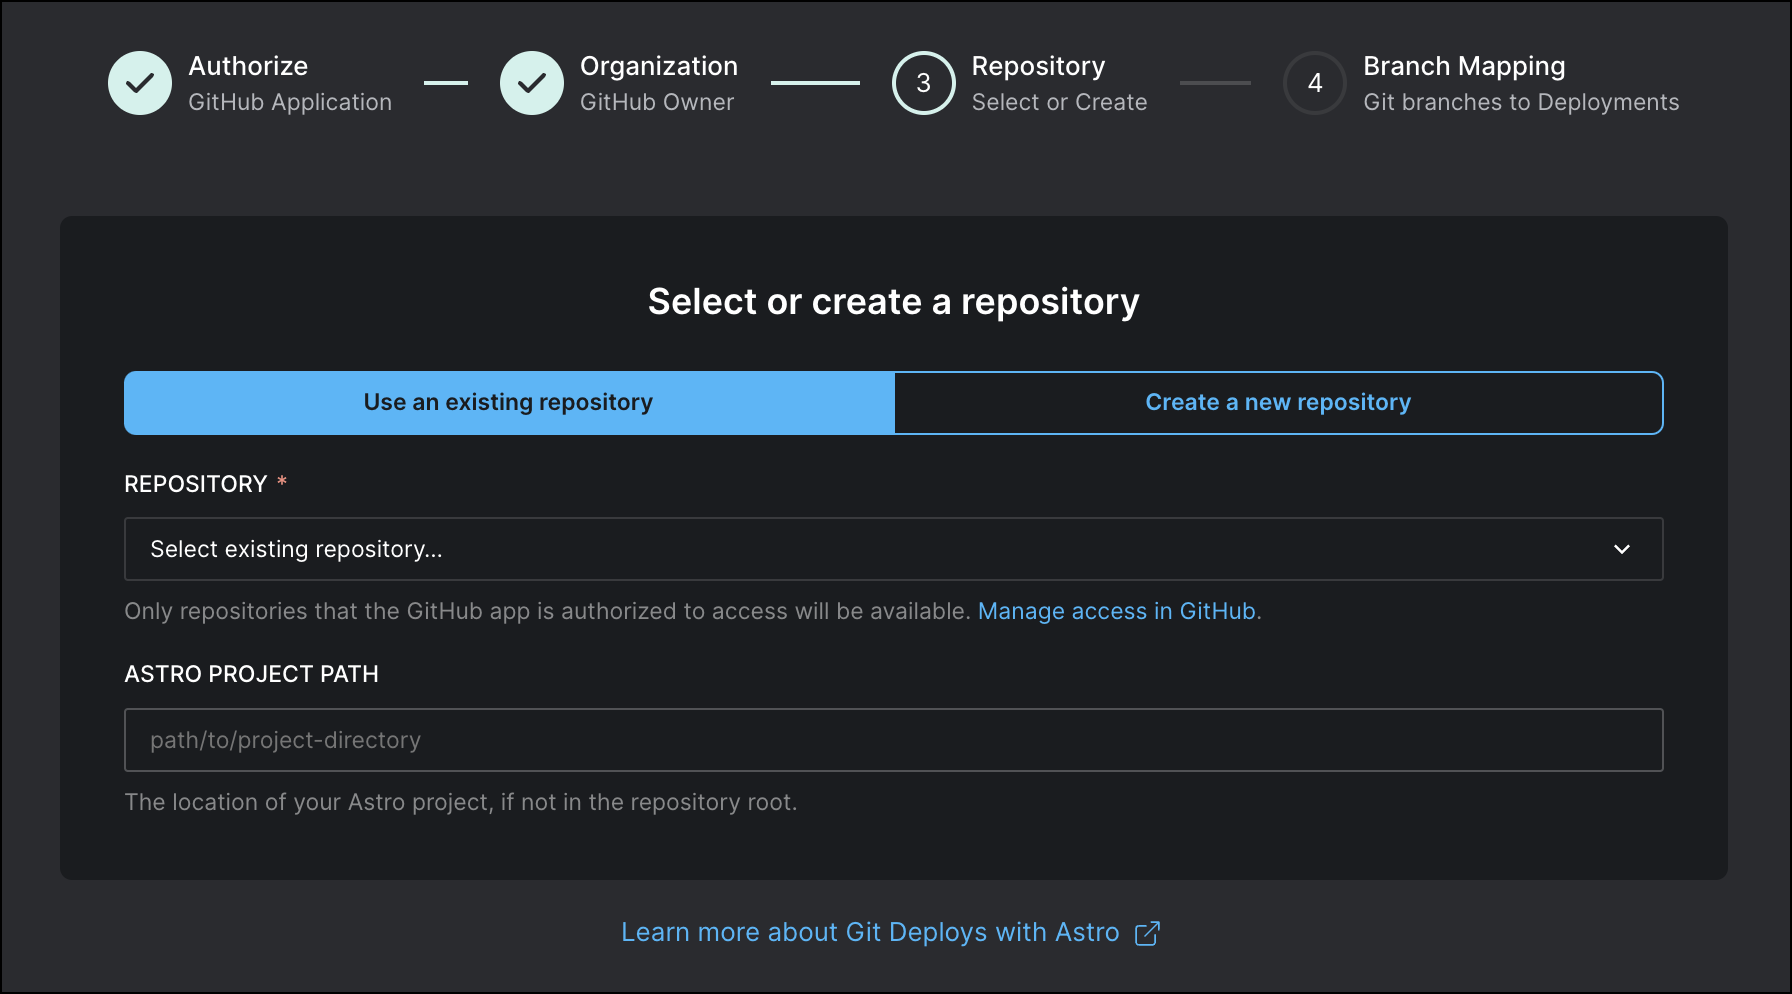
Choose which repositories you want to enable the app for. You can either select an existing repository, or create a new repository. Then, click Create and Connect Repository.
-
Configure the following fields:
- Repository: Select the repository you want to integrate with Astro.
- Astro Project Path: Specify the path to your Astro project relative to your GitHub repository directory, up to and including the Astro project folder. For example, for a project in
github-repository/myorg/myprojects/my-astro-project, entermyorg/myprojects/my-astro-project. If the path is configured incorrectly, code does not deploy to Astro from GitHub. You can change this path after you create the integration by editing the Branch Configuration setting in the Astro UI.
-
Click Connect Repository.
-
Map specific branches in your repository to Deployments in your Workspace. For example, you can map a development branch and your production branch to separate Deployments, so that bugs in development don’t affect your production data pipelines. When you map a branch to a Deployment, any future commits to the Astro project in that branch trigger a code deploy to Astro.
You can add and edit branch mappings to connected GitHub repositories at any time from the Git Deploy page in the Astro UI.
Any commits to your mapped branches will now trigger a code deploy to the corresponding Deployment.
Deploy from GitHub to Astro
To deploy code from your GitHub repository to Astro, you can:
- Make a direct commit to one of your mapped branches.
- Merge a pull request against one of your mapped branches.
- Select Trigger Git Deploy from the More actions menu in your Deployment settings. This deploys the latest commit from your branch. Astronomer recommends this action when your Git branch and Astro fall out of sync and you don't want to create a new commit to get them back in sync.
- Select Trigger Git Deploy from the More actions menu for a previously failed deploy. This redeploys that particular Git commit even if it's not necessarily the latest commit in your repository or branch. Astronomer recommends this action when a deploy fails and you want to try it again without creating a new commit.
Any of these actions triggers the Astro App to deploy your Astro project to the mapped Astro Deployment. When DAG-only deploys are enabled, your GitHub repository triggers:
- A DAG-only deploy if only your DAGs are changed.
- A full project image deploy if you change a configuration in your project.
If DAG-only deploys are disabled, all code changes will trigger a full project image deploy. To learn more about DAG-only deploys, see Deploy DAGs to Astro.
You can check the status of your deploy in the Astro UI in the Deploy History listing on your Deployment's Overview tab.
Review code deploys from the Astro UI
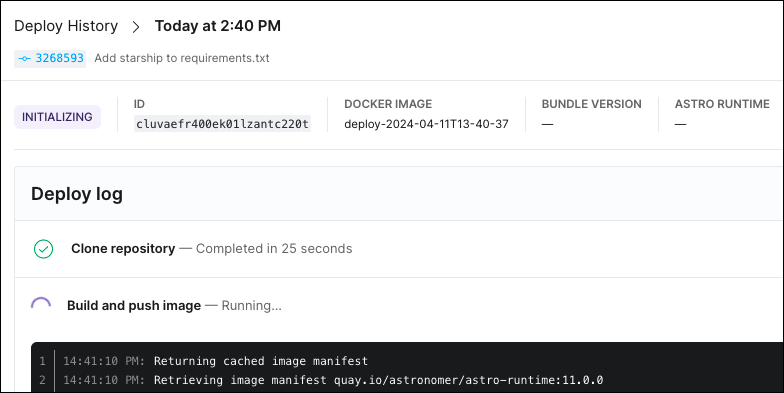
When you trigger a code deploy by committing a change to one of your mapped branches, details about the code deploy appear in the Astro UI. For past and currently running deploys, you can review:
- Whether a deploy was triggered by the integration.
- At what time the deploy was triggered.
- Which pull request or commit triggered the deploy. This includes the Git commit description and a link to your pull request if applicable.

To review code deploys:
- In the Astro UI, open your Deployment.
- Click Overview.
- Deploys triggered by the Astro App include a commit ID in their Description and are Deployed By the GitHub App. Click on a deploy triggered by the Astro App to see the logs for the deploy.
How it works
The Astro GitHub integration works through a GitHub app that you install in your GitHub repository. The app is also authorized to act on behalf of your personal account so that it can see the GitHub organizations and repositories you have access to.
Deploys
When you make a commit or merge a pull request to a mapped branch in your repository, the GitHub app sends a push event to the Astro API. After the Astro API confirms that the push event should result in a deploy, your project code is sent to Deployment-specific workers on Astro that deploy the code to your Deployment.
If an additional deploy is triggered while a deploy is currently processing for the same Deployment, Astro will terminate the first deploy and begin processing the second deploy. The first deploy will appear with a Failed state in your deploy history.
Rollbacks
When you roll back a deploy created by the GitHub integration, Astro does not roll back the code in your GitHub repository. Therefore, rollbacks should only be used as a last resort due to the potential for your repository code to become out of sync with your deploy code.
If you do roll back a deploy, manually revert the code in your GitHub repository as soon as possible so that it matches the code running in your rolled back deploy. For more information, see What happens during a rollback.
